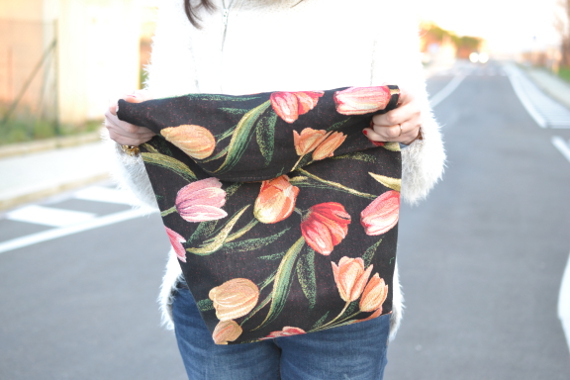
Jil Sanders proposed it at first, and Zara soon after it. The new lunch bag, I love it, simple and practical, and I could not wait poposing it in handmade key, right? Not black, trivial, but in damask because let’s face it, why follow a trend only when we can follow two at he same time? Arm yourself because you will need a sewing machine!
L’ha proposta Jil Sanders, e Zara a ruota. La nuova lunch bag a me piace moltissimo, semplice e pratica e non potevo non riproporvela in chiave handmade, giusto? Non in nero, banale, ma in damascato perche diciamolo, perche seguire un trend solo quando ne possimao seguire 2 insieme? Armatevi di macchina da cucire perche vi servirà!
Read also: How To Clean Cornhole Bags – Step-by-step in Great Detail
First cut out a rectangle 45 cm wide and 160 cm long. Fold it in half along the length (from back), so you have a rectangle of 45x80cm. Sew the edges and then reverse it.
Prima cosa ritagliate un rettangolo largo 45 cm e lungo 160 cm. Piegatelo a meta secondo la lunghezza (da rovescio), in modo da avere un rettangolo di 45x80cm. Cucite i bordi e poi rigiratela.
Now comes the tricky part, not to do but to explain, take the envelope from the corners, put a pin to 10 cm away from the corners along the base, then enlarge and bend your toes inward as if it were a gift.
Adesso viene la parte complicata, non da fare ma da spiegare, prendete la busta dagli angoli, mettete uno spillo a 10 cm di distanza dagli angoli lungo la base, poi allargatela e piegate le punte verso l’interno come fosse un pacco regalo.
Read more:
- How To Clean Macbook Pro Fan Without Opening
- Does Anything Dissolve Baby Wipes in the Septic Tank or Toilet?
- Laundry Tips and Guidance: What Colors You Can Wash Together?
- Bona Vs Swiffer: Which Hardwood Flooring Cleaner is Better?
Stops the tips to the length found, in this way you will have prepared the base. There will only have to finish the top and the bag is ready to be rolled up and carried under your arm.
Fermate le punte alla lunghezza trovata, in questo modo avrete preparato la base. NOn vi resterà che rifinire la parte alta e la borsa sarà pronta per essere arrotolata e portata sottobraccio.